A Simple Project Management Workflow for Ionic Developers
This is part of a series, check out the other parts below:
Are you the type of developer who just gets right into building the application without worrying too much about planning or tracking anything? Maybe you just work straight off of the main branch in your repository and just let the code take you where it will.
If you're a somewhat experienced developer, you might feel like you know what needs to be worked on and any planning or processes outside of the code will just get in your way. Sometimes it does, and you can build faster without planning.
But this strategy breaks down for any type of application that will live for any significant period of time, and coding without planning and processes in a team setting is a recipe for disaster.
If you are building an application that fits any of the following criteria:
- It's not just for learning/fun
- It will be a reasonably complex application
- It will need to be maintained long term (e.g. more than 6 months)
- It will be built by more than just you
- It's being created for a professional purpose (e.g. paid client work)
Then you should strongly consider using some kind of structured project management workflow like the one I will describe in this tutorial.
I will be outlining a reasonably simple project management and Git workflow that you can use for building your Ionic applications. This is just a process that I have put together for myself that makes sense to me and the way I work (but it is also based on established best practices). You don't have to implement everything exactly as I describe - you might choose to only use parts of it or modify it to suit your needs.
If you would like a quick video overview of this process you can check it out here: Git Workflow and Project Management for Ionic Projects. The video just walks through using the process, you will still need to read through this article if you want to set everything up.
There is nothing specific to Ionic about this process, you could use this same workflow for just about any software project. The only reason this is for Ionic developers is because it is written with that audience in mind.
Outline
Source codeAn Overview of the Workflow
Before we get into the specifics of how to implement this, let's briefly discuss the general ideas and concepts behind this workflow.
First, to give you some context, here is a basic overview of the project management process we will be creating:
- All work is defined in issues that will describe features/user stories but also simple tasks like bug fixes and config changes
- New issues are automatically added to a backlog in a Kanban board
- The backlog is sorted by priority (more important items at the top)
- To begin work, you move an issue from the backlog to one of the working columns in the Kanban board
- A new branch is created for work on every issue. Even if it is just a minor config change, every issue gets its own branch (this is generally referred to as Branch-per-Issue or Task Branching)
- Once the work is complete, the branch is merged back into the main branch and the issue is closed (and will automatically be moved to the Done column in the Kanban board)
We will be using Github to implement this process, but the same process could be translated to other providers as well.
The main benefits to this approach are:
- The main branch is kept clean and releasable at all times (theoretically)
- The branches contain small well-defined chunks of functionality that will be merged back soon: you don't have massive features living off in their own branch for extended periods of time
- You can easily pick/choose what gets merged into the main branch and released
- You can easily switch between working on different tasks without having the codebase be in a broken/inconsistent state
- Suits both Scrum or Kanban style Agile development
I don't want to make this tutorial an introduction to Agile development, but if you are not familiar with this style of development let me give you a quick overview. One of the key ideas of Agile development is that we make frequent and incremental releases of the software. This allows for a quick feedback cycle as we can show a subset of working features to stakeholders many times throughout the development lifecycle, which will allow us to adapt and change to feedback and clarifications and improve the development process as we go. Scrum and Kanban are just two different frameworks for facilitating Agile development.
The approach we will be using not only facilitates these frequent and incremental releases - it makes it extremely easy to do because the main branch will always (theoretically) be in a releasable state.
We will be using a Kanban board but we aren't specifically applying the Kanban framework here, nor will we be strictly implementing Scrum. You could implement more processes from either of those Agile frameworks to better suit you and your team. I have intentionally made this workflow as simple as possible, so useful ideas from both Scrum and Kanban have not been implemented here.
This process can be used for an individual or small teams. There is nothing wrong with using this process for large teams as well, but large teams will probably want to incorporate more processes and governance controls (and larger teams likely already have their own processes).
This is best for private repositories where every issue added indicates some feature that will be implemented (even if it is just a bug fix or config change). If you have an open source project where issues might be submitted by other people you might want to modify this (perhaps by having some triage process that controls what issues actually get added to the backlog).
Setting up Project Management
I'm going to keep the outline of this process as simple as possible, including only the things that I think are core to the process. You can add whatever additional bells and whistles (like labels and naming conventions) and additional ideas from Scrum or Kanban that will help you be more productive. Frameworks like Scrum and Kanban are not designed to be strictly adhered to, it is always better to adapt these processes to best support whatever makes you/your team most productive (but you should strictly adhere to whatever process you create).
Let's start from the beginning!
- Generate a new application
- Optional: Set up a testing framework
- Commit your changes:
git add .
git commit -m "initial commit"- Set up a remote repository on Github
- Create a new repository and push your existing repository up to it:
git remote add origin [email protected]:YOURUSERNAME/YOURPOJECT.git
git branch -M main
git push -u origin main
NOTE: The default Github instructions have you create a new branch called main which then becomes your primary branch rather than the default master. I will be using this convention throughout the tutorial, but keep in mind that main and master generally refer to the same thing.
- Go to the Project tab in your Github repository and click Create Project:
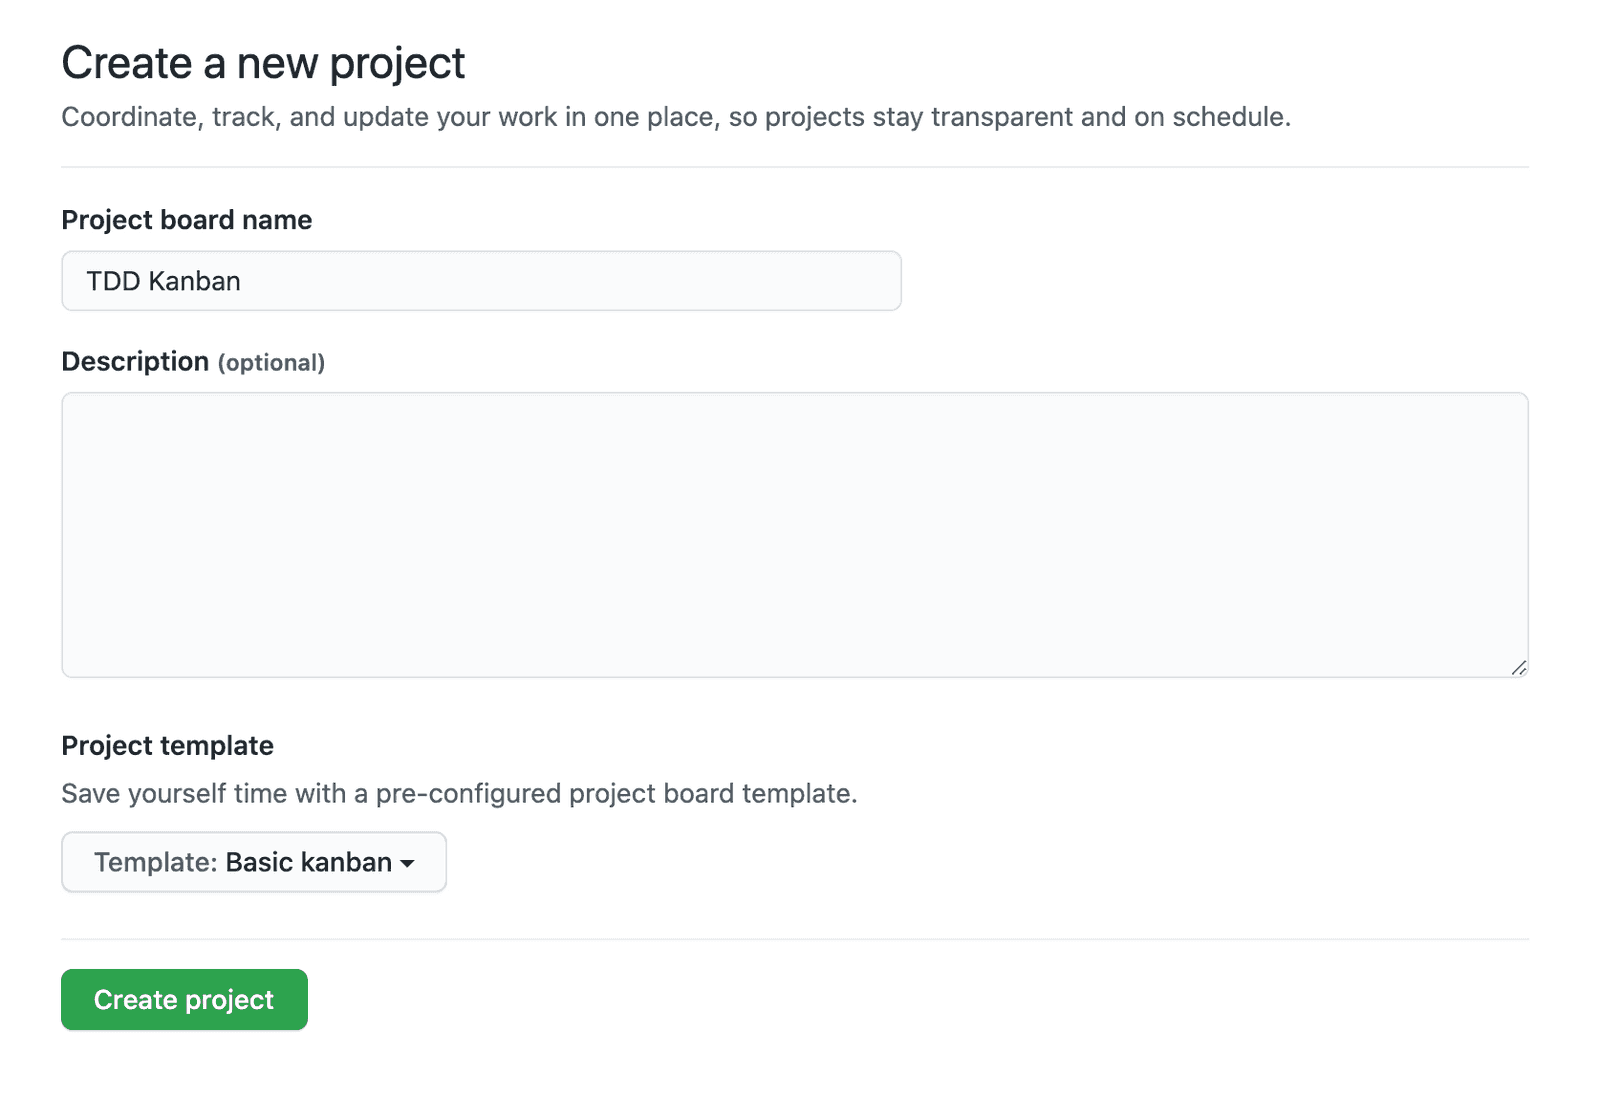
- Create your project using the
Basic kanbantemplate - Delete all the notes in the
To docolumn - Now we are going to rename the Kanban columns to suit our needs, exactly how these are named will depend on your testing strategy
If you are using Test Driven Development set up the following columns:
- Backlog | Test | Code | Refactor | Done
If you are using automated tests but not using TDD set up the following columns:
- Backlog | Code | Test | Refactor | Done
If you are not using automated tests at all set up the following columns (I highly recommend investigating adding automated tests to your strategy):
- Backlog | Code | Refactor | Done
This is a good spot to modify the columns to best suit your own workflow. For example, if you are working in a team or have access to someone who could perform a code review for you, you might add an additional Peer Review/Code Review column before the Refactor column.
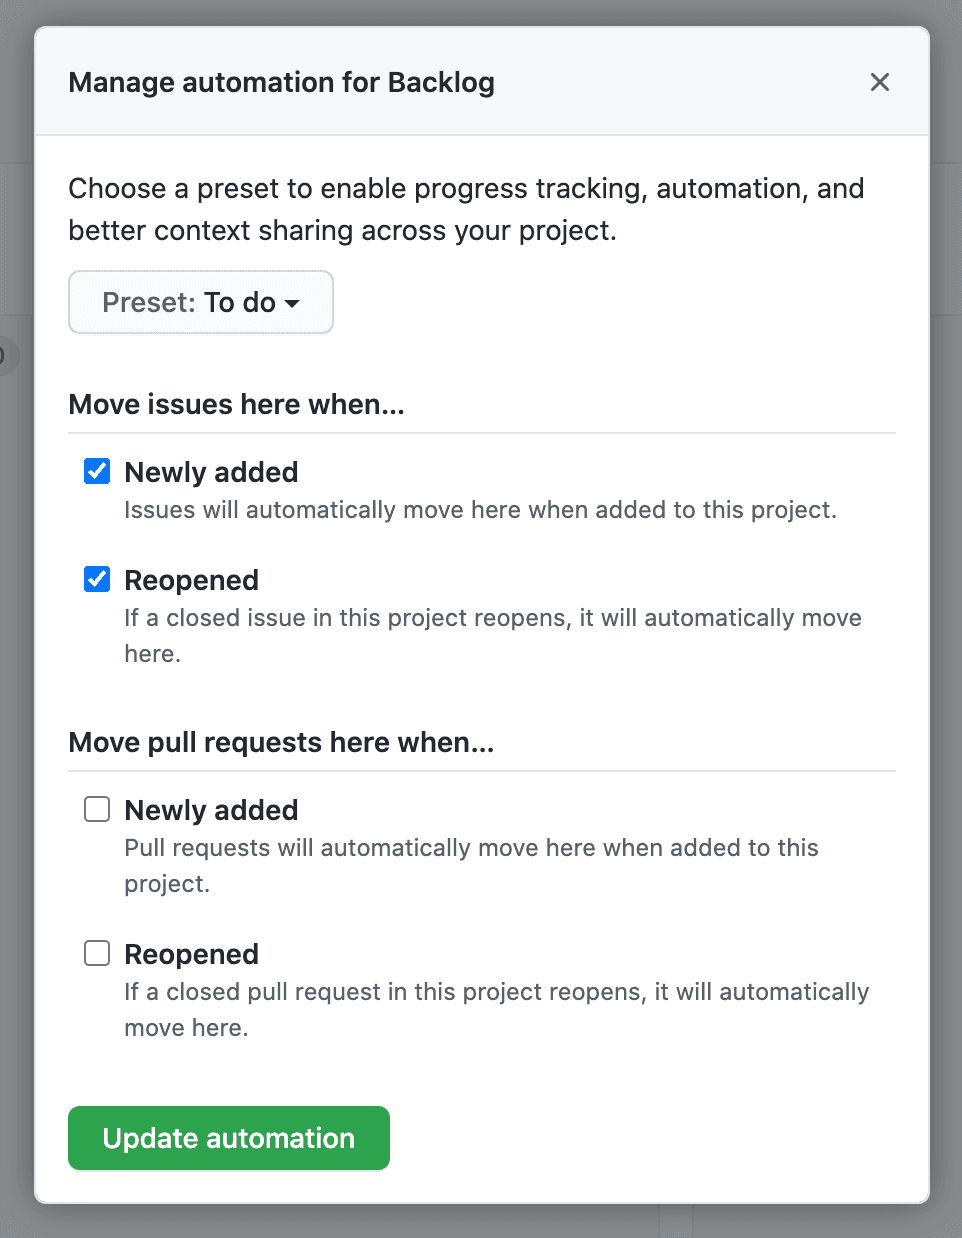
- Click the more options button on the Backlog column and choose
Manage automation - Use the
Todopreset and select theNewly addedandReopenedoptions for Move issues here when...
- Do the same for the Done column except choose the
Donepreset and select theClosedoption for Move issues here when...
We want to automate this process as much as possible to reduce (and ideally eliminate) any tedious repetitive work we would have to do. Even though we have set up an automation to automatically move issues into the Backlog, this will only move issues to the Backlog when they are added to the project (not just when they are created). This means we would manually have to set the project of an issue to our Kanban board when we create the issue. If we forget, the issue will not be added to the Backlog. If you are primarily relying on the Backlog as your mechanism for prioritising and selecting work, then issues that are not added to the Backlog might go unnoticed. This is not a good situation.
To deal with this, we will be setting up a Github Action using: Assign to One Project. This will allow us to have a Github Action that runs whenever a new issue is created and automatically move it to the project for us.
- Through the Github UI, click the
Add Filebutton and create a new file at.github/workflows/assign-to-one-project.ymland add the following:
name: Auto Assign to Project(s)

on:
  issues:
    types: [opened]
env:
  GITHUB_TOKEN: ${{ secrets.GITHUB_TOKEN }}

jobs:
  assign_one_project:
    runs-on: ubuntu-latest
    name: Assign to One Project
    steps:
      - name: Assign NEW issues to Kanban
        uses: srggrs/[email protected]
        if: github.event.action == 'opened'
        with:
          project: 'https://github.com/yourusername/yourrepo/projects/1'
          column_name: 'Backlog'
The two important configurations here for the Github Action are project and column_name - you should modify the project to point to the URL for your project (i.e. the URL to your Kanban board not to your repository) and the column_name can stay as Backlog unless you called it something else. With this configuration, any new issues that are opened will automatically be added to the Backlog column in the Kanban board.
Once you have added this to the file, make sure to choose the Commit directly to the main branch option and then click Commit new file.
NOTE: Using a Github Action to achieve this does result in a slight delay before the issue is moved into the project (maybe 30 seconds or so). You can also manually select the project when creating an issue if you want it to instantly appear in the backlog, and then the action will catch any issues you forgot to add to the project.
- Add
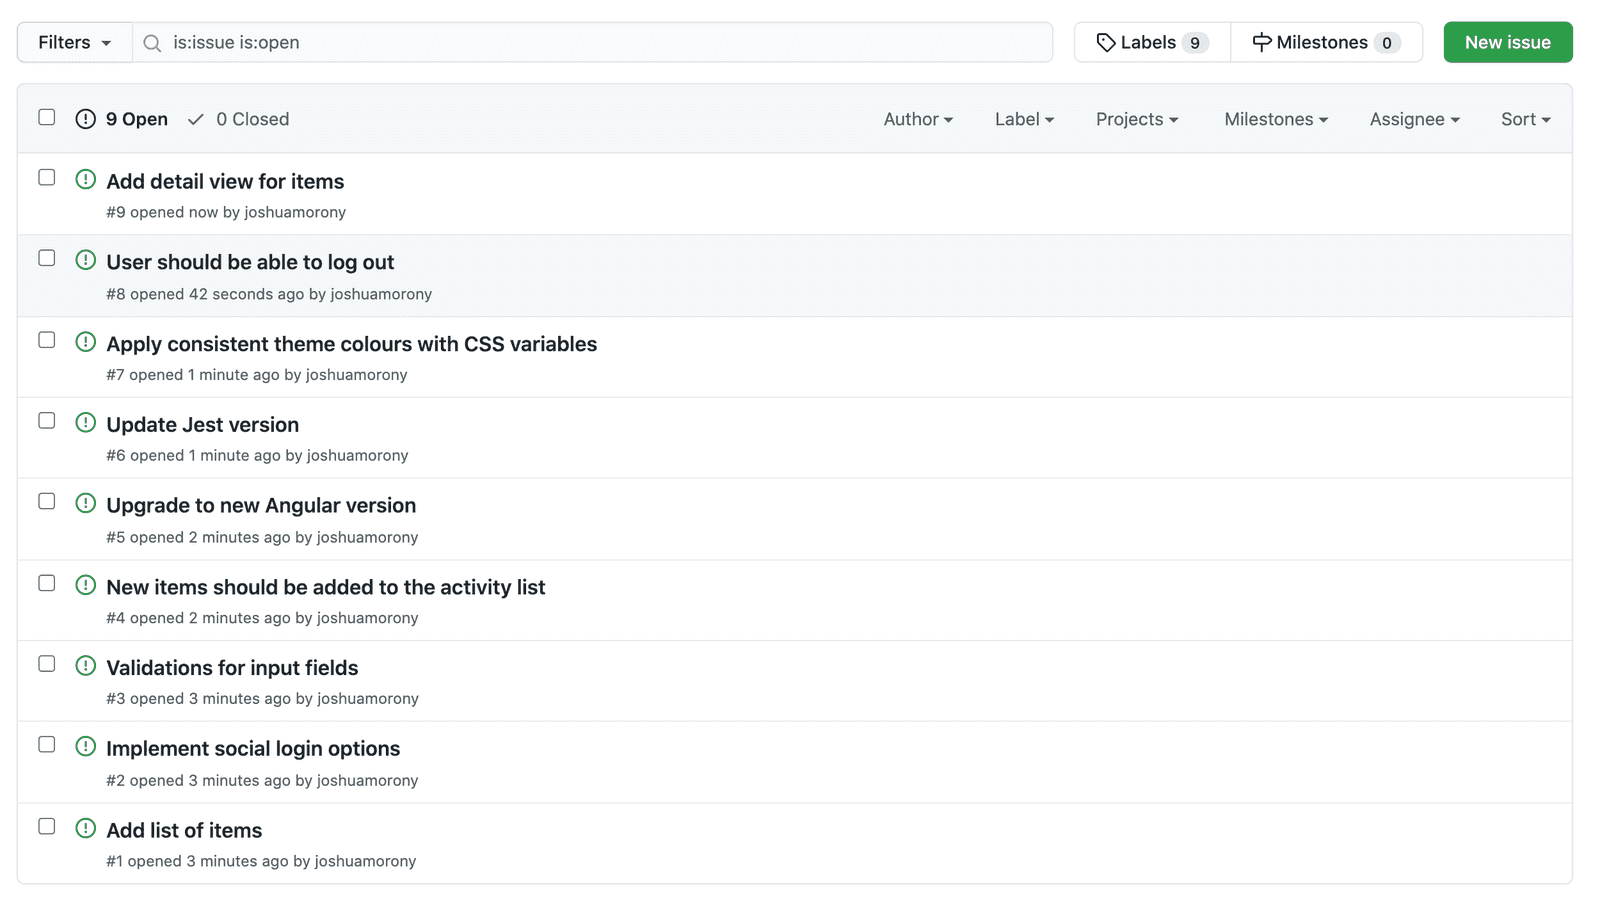
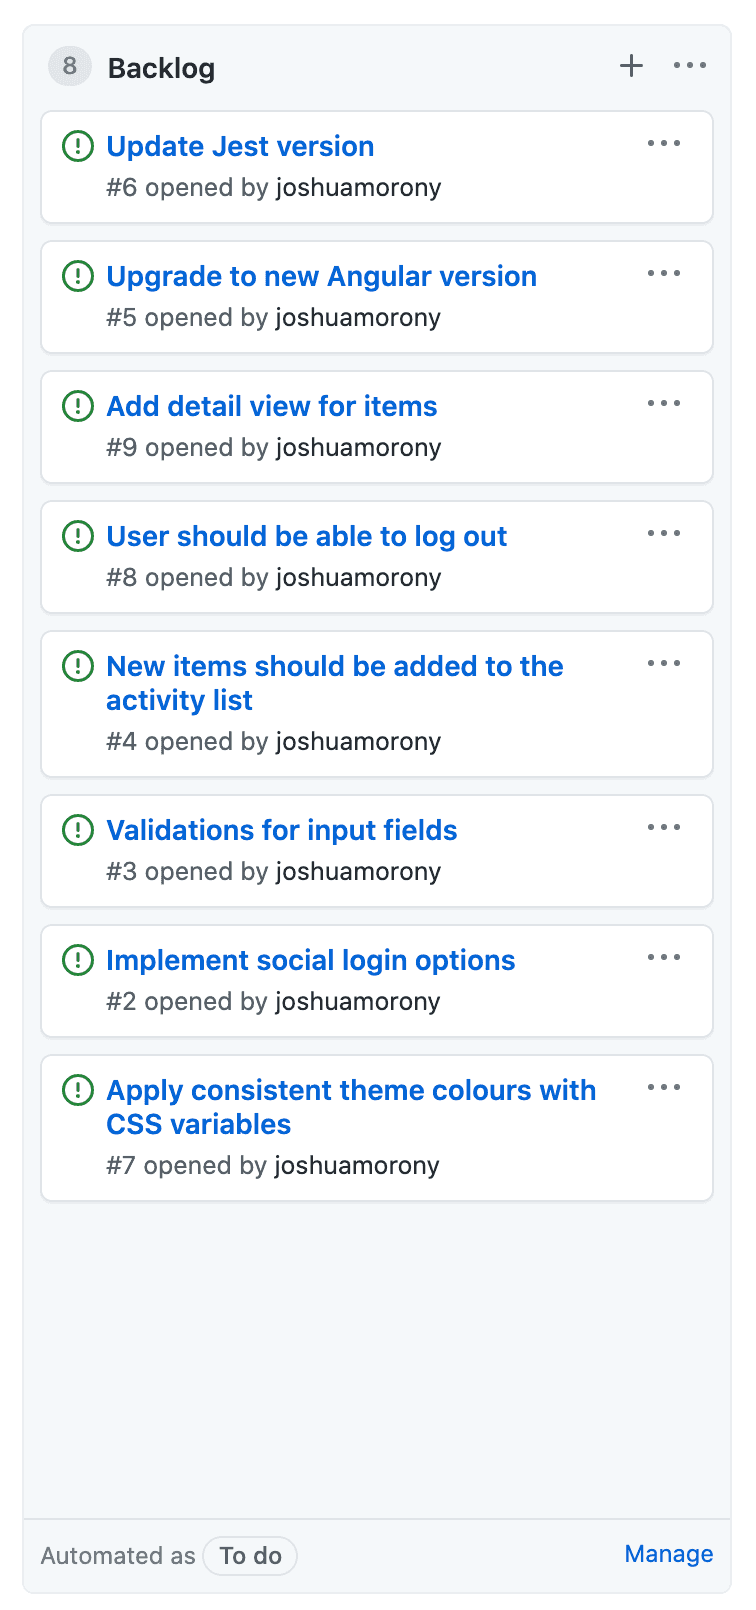
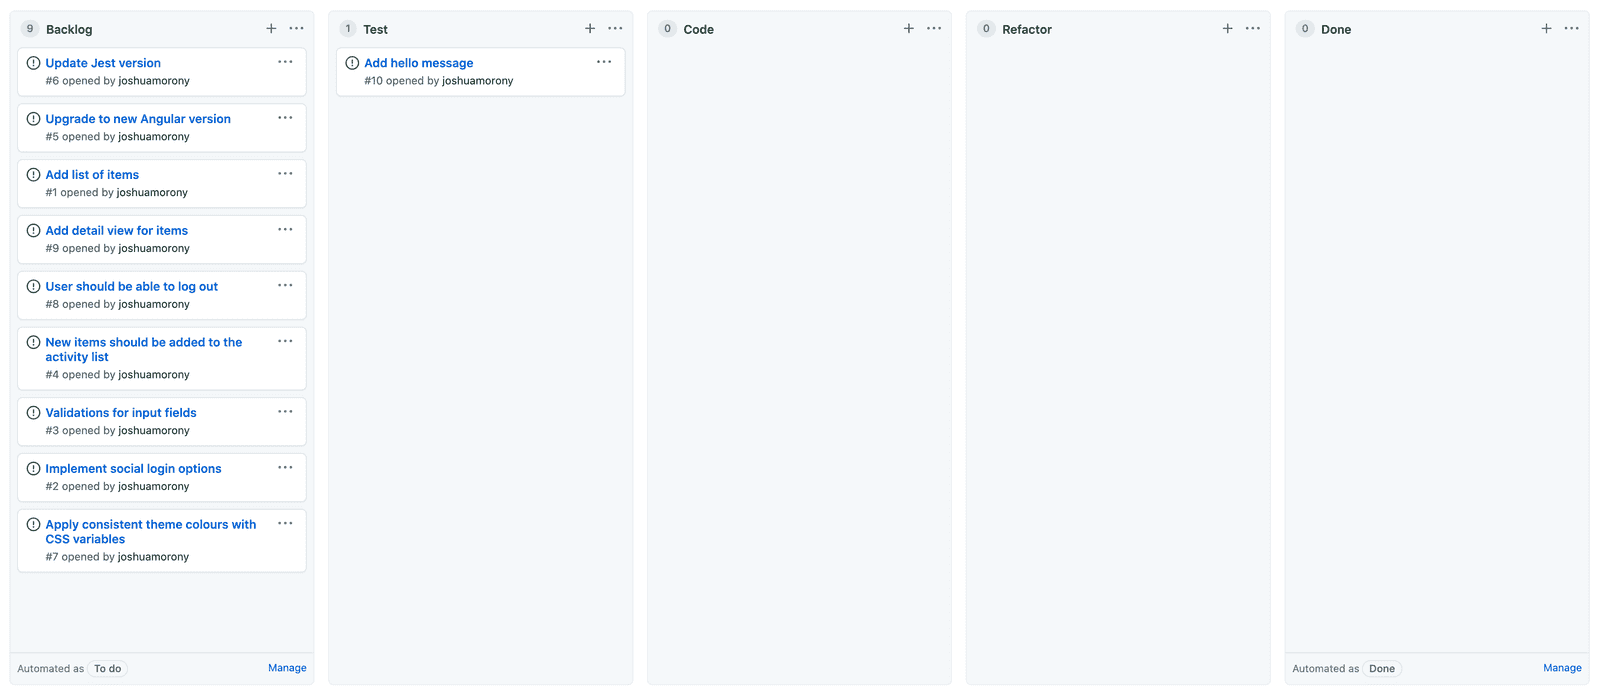
user stories/features/bug fixes/chores/ any work you want to do as issues in your repository - Go to your Kanban board and sort the Backlog such that the more important/priority items are towards the top of the Backlog (it does not need to be exact):
Implementing the Git Workflow
Now we have the project management side of things set up. We have a sorted Backlog of features that need to be implemented and we can now start using our Kanban board to organise and track what we are working on. Let's take one of the issues from our Backlog and walk through what the Git workflow would look like for completing work on that issue.
Each time we want to perform some work it would look like this:
- Select an issue from the Backlog and move it to the Test column or the Code column if you are not using TDD. For the rest of this example I will assume the TDD approach, but if you are not using TDD you can adapt the instructions to suit your workflow.
- Make sure you are on the
mainbranch and have the latest updates in your local repository:
git checkout maingit pull- Create a new branch for the issue using some kind of consistent naming convention. I will just use
[my-initials]-[issue-number]but you can use whatever you like:
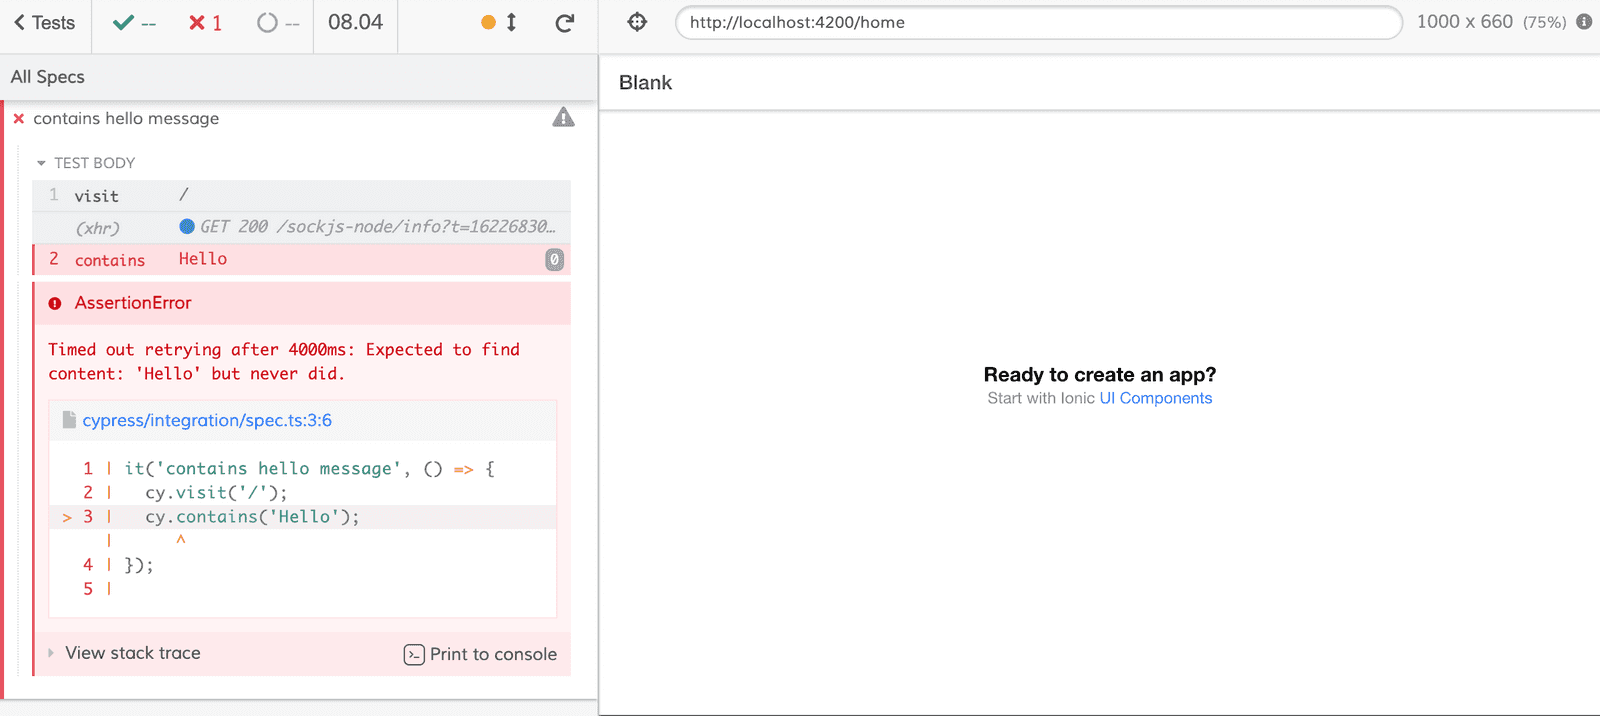
git checkout -b jm-10- Write an E2E test for the code you are about to work on and make sure that it fails:
- Commit your code and push back to GitHub referencing the issue you are addressing:
git add .
git commit -m "#10 added E2E test"
git push --set-upstream origin jm-10
NOTE: You will only need to set the upstream the first time you are pushing a new branch back to the remote repo. In future you will be able to just git push.
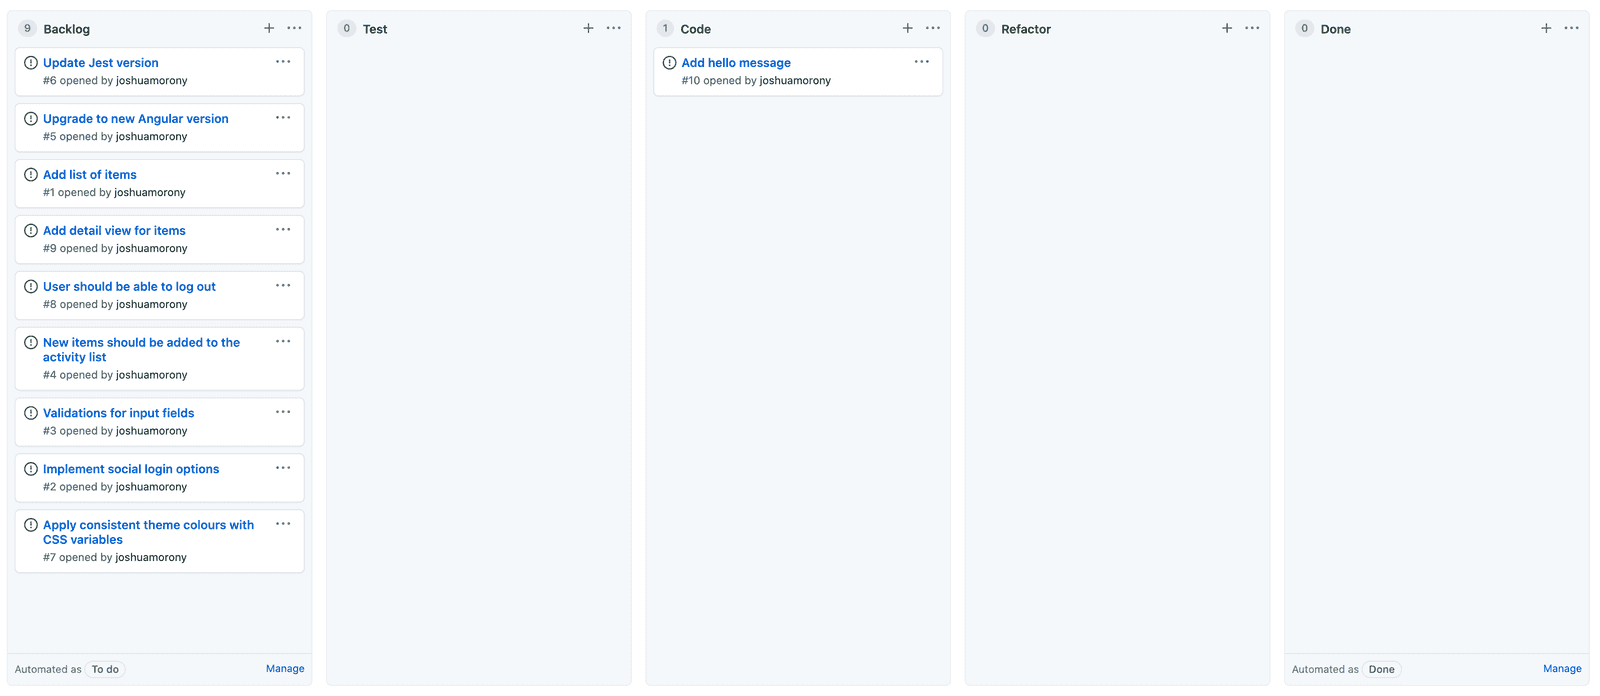
- Move the issue from the Test column to the Code column in the Kanban board:
- Add the code required to satisfy the E2E test (creating more unit tests as necessary). You should commit frequently as you work on this branch and push your changes back to Github - you do not need to finish the work and have tests passing before pushing back (this is a benefit of using a branch). Make sure to reference the issue with each new commit:
git add .
git commit -m "#10 added the first two letters of hello"
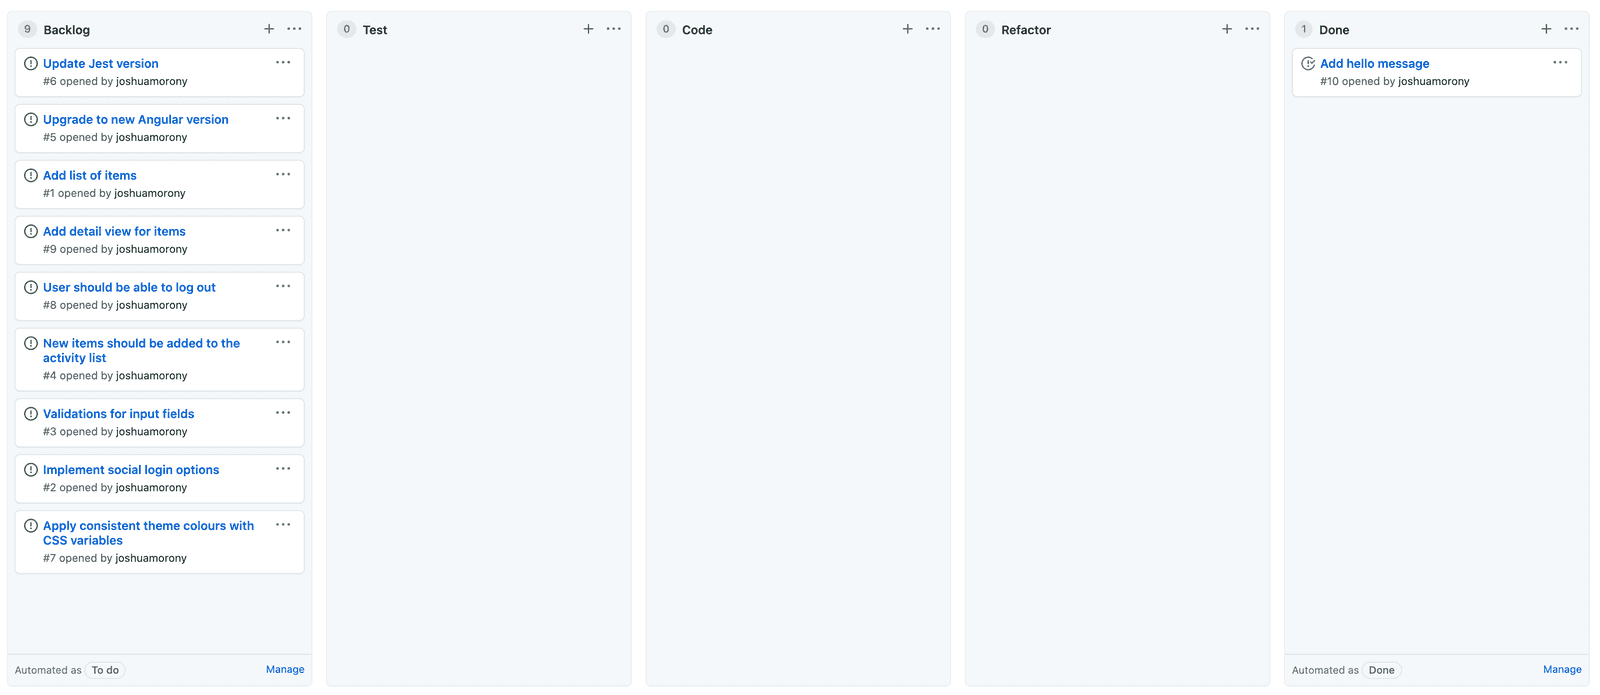
git push- Once the work is finished push your code once more referencing the issue. If the work does not need refactoring you can uses the
closessyntax to automatically close the issue and move it to the Done column in your Kanban board:
git add .
git commit -m "closes #10 added the last letters of hello"
git push
If the work does need refactoring or if you want to include some kind of code review process just push the code back normally:
git add .
git commit -m "#10 added the last letters of hello"
git push
You can then manually move the issue in the Kanban board over to the Refactor or Review column.
NOTE: The closes syntax will only move the issue into the Done column once it is merged with the main branch. If you are not merging with main right away, you might want to manually move it over to the Done column on the Kanban board.
Merging Back into the Main Branch
Now that we have the work completed for our branch, we need to get that code back into the main branch. This is another area where you might want to add your own rules/process. You might require pull requests to get code merged into the main branch and you might have some kind of gatekeepers deciding what can be merged into the main branch. The main branch is supposed to always be stable and releasable, so in some cases it is going to make sense not to allow everyone to merge into the main branch.
Since the main branch may have changed, we will want to first update our branch with any updates from main before we merge back into it. We will use a merge to achieve this which is similar to rebase but the way it treats the history is different. With the rebase method, it will take the current version of the main branch and then replay all of our changes over the top of it. It will be as if we had just checked out the latest version of main and built our feature on top of it immediately after (whereas changes we made might have actually been committed before recent work that was done in main). With a merge history is preserved - instead of replaying your changes on top of the latest updates from the main branch they are merged into it. Although different circumstances might call for different approaches, I think the a merge is generally the easier/safer option to go with.
Stuff like this is a point of contention for people, if you have your own philosophy or preference here feel free to do whatever you like!
- Switch back to the main branch:
git checkout main- Pull in the latest changes:
git pull- Switch back to your branch
git checkout jm-10- Merge the
mainbranch into your branch
git merge mainNOTE: If there are conflicts (i.e. a change you have made collides with a change in main) you will see a message stating which files contain conflicts. You will need to open these files, resolve the conflicts, and then add/commit those files. Keep in mind that after running git merge you can run git merge --abort to undo that action.
Now that our branch is up to date with main, we want to merge the branch into main.
- Switch back to the main branch:
git checkout main- Merge the branch into the main branch:
git merge jm-10- Push the changes back up to the remote repository:
git pushNow our work is complete!
If after completing the work and merging you discover the user story was not satisfied or the bug wasn't actually fixed, you can just reopen the issue. This will automatically move it back into the Backlog to be addressed.
Final Thoughts
This method will result in a lot of branches being created. Generally it isn't necessary to delete these branches but you might want to clean them up, especially if you are running CI builds on your branches. To delete the branch once it is merged back into main you can just run the following commands to delete the branch in the remote repo and in the local repo:
git push origin --delete jm-10git branch -d jm-10If you are working in a team setting, you might also want to consider having an integration branch that lives alongside the main branch. Whilst two branches might individually work and pass all tests, when integrated together they might break something. Rather than this happening in the main branch, you can first merge your code with the integration branch. If all the tests are still passing then you can merge from your branch into the main branch. Whether you include an integration branch or not depends on your tolerance for the main branch being in a broken/unstable state. If you release infrequently this might not matter, you can just fix the main branch. If you want to release daily, you will probably want an integration branch or some other strategy to deal with this.
If you would like a quick reference for the commands required to use this workflow I have created a cheat sheet: Git Workflow Cheat Sheet

