
Adding Continuous Integration (CI) Builds to Your Ionic Project
This is part of a series, check out the other parts below:
Continuous Integration (CI) is one of those terms that people have some opinions about. This article is not going to be concerned too much with providing the most accurate or pure definition and implementation of what a Continuous Integration process should look like, we will just focus on the general idea and how to get value out of it using Github Actions.
Outline
Source codeA Brief Introduction to Continuous Integration
The main idea behind Continuous Integration is continuously integrating code into a shared repository. As with most software management terms, it's a bit vague and has some room for interpretation. If you're interested in the origin of Continuous Integration, I believe it's coining can be traced back to Kent Beck and the creation of the Extreme Programming methodology. Let's see if we can get a sense of the spirit of what it is (at least in the sense of how most people go about using the concept today, not necessarily inline with its original definition).
An example of what is NOT Continuous Integration:
Various chunks of code and features live off in their own branches somewhere, or on the developers local machine, for long periods of time. Once fully completed these changes are merged back in with the rest of the code in a shared repository (potentially causing merge conflicts and integration issues with other new code)
An example of what IS Continuous Integration:
Small chunks of code are worked on and are frequently merged back in with the rest of the code in a shared repository. Since code is pushed frequently there are less likely to be merge conflict, it will be easier to deal with integration issues, and it reduces the barrier to deploying the software.
The core idea is that we are merging back into the main branch of the repository as often as possible.
Side note: what really constitutes CI?
I mentioned this is one of those things people have opinions about, and that's fine. If the goal is to find the best way possible to deliver high quality software that's great... but people do have a tendency for squabbling over definitions that don't actually result in better outcomes for themselves or their team.
We will be continuing with the example we used in the previous article in this series, where we used a task branching or branch per issue approach to managing our project.
Some people would not consider this to truly be Continuous Integration since we are creating branches, whereas perhaps a more pure definition would require that all code is always committed to the main branch.
Personally, I find the task branching approach more practical and by design these branches are very short lived so they will soon be integrated back into the main branch. In my view, it still captures the spirit of Continuous Integration and delivers most of the benefits.
This is what works for me, but just keep in mind that the goal is to find what works best for you or your team. Be willing to experiment and see what you like best, but don't get too caught up trying to meet definitions just for the sake of doing it the right way.
Merging Frequently into Main: A Recipe for Disaster?
But... your main branch is usually where your production releases are pulled from. We can't have developers committing code willy nilly and messing up our production builds!
This is where CI Builds come into play. A core part of making this process feasible is that we have well defined automated tests. Our tests should ensure that the code is working as expected, and will warn us when it's not. This creates the level of confidence required to frequently merge code into the main branch.
The process for adding a new feature or bug fix might look like this (we will assume a TDD approach is being used, but other testing strategies are fine too):
- Create a test for the new feature
- Write code to satisfy the new test
- Make sure you have the latest code from the remote repository
- Run all of the existing tests locally to make sure they pass
- Merge the new code back into the main branch
- A CI Build is created automatically to run tests on the code that was just merged
- The passing or failing state of the branch is displayed (and can also be used for more advanced governance controls)
Running the tests locally is a great and is an important step, but it requires that everyone follows the rules, that is:
- Finish feature
- Pull in latest changes from main
- Run tests
- Merge code
Let's say we run the tests locally and everything is passing... but we forgot to pull in the latest code from the main branch before doing that. Now when we merge back into the main branch there might actually be failing tests that we don't know about. Maybe we forgot to run the tests entirely before merging. Maybe a developer was just feeling a bit lazy and thought... it's just a minor change, it'll be fine!
If we have CI builds set up to run these tests automatically, we can easily see whether the main branch is in a stable state or not, no matter what any individual does. If code is added to the repository, then our tests will run.
We can use something like Github Actions (Jenkins and Circle CI are also popular options) to automatically:
- Take the source code that was deployed to the repository
- Boot up a virtual machine to run the application on
- Install all the required dependencies
- Build the application
- Run our automated tests (or any other commands we want)
Basically, we can do whatever we might want to do to test our application locally, but it will do it automatically in the cloud whenever code is pushed to the repository by anyone.
Not only can we run our tests with the CI Build but we can also run linters, security checks, and more. Although we will not be covering this kind of set up in this article, you can also use the passing/failing state of the CI build to safeguard other actions like the ability to merge pull requests (i.e. only pull requests with passing CI builds can be merged).
The other part of this is that you might not be ready to release a particular feature yet. Maybe it is missing some parts or maybe you just don't want to go public with it yet. This is where feature flags can be useful. We will not be discussing feature flags in this article, but the basic idea is that it allows for the dynamic toggling of certain features within an application.
Now let's get into the interactive part of this tutorial.
Creating CI Builds with GitHub Actions
As I mentioned before, we will be continuing on from the example we set up in the previous article in this series. Although the previous article does contain some important context for how we will go about adding features to the application, it is not strictly necessary to follow that process in order to get these CI builds working.
If you have followed along with the previous tutorial, then you will already be somewhat familiar with GitHub Actions. We used a GitHub Action to automatically move any newly created issues to our projects Kanban board.
The GitHub Action required to get our CI builds working will look very similar. It will just be a YAML (.yml) file that contains some instructions. GitHub does provide templates that you can use if you go to the Actions tab and select New workflow but we will be creating ours by manually defining the action in a main.yml file (the specific name of the file is not important).
The example project we have been working on uses Cypress for E2E (End-to-end) tests and Jest for unit tests. Our goal is to get our CI build to run both of these sets of tests.
Fortunately for us, the Cypress team maintains a GitHub Action that we can use to build and run the E2E tests for our application, and then we can just tack on an extra command to also execute the Jest tests as well.
Before we actually go about actually adding the main.yml file (we will use our project management process to do this), let's just take a look at what it will look like:
name: Tests

on: [push]

jobs:
  run-tests:
    runs-on: ubuntu-latest
    steps:
      - name: Checkout
        uses: actions/checkout@v2
      # Install NPM dependencies, cache them correctly
      # and run all Cypress tests
      - name: Cypress run
        uses: cypress-io/github-action@v2
        with:
          build: npm run build
          start: npm start
      - name: Jest run
        run: npm test
It might look a little bit intimidating, but this file describes a step-by-step process for creating the build and executing the tests. Let's talk through what is actually happening here:
- Create a workflow called
Tests - Trigger it when code is pushed to the repository
- Define a job called
run-tests - Use a virtual machine running
ubuntu-latestto run the build on - Define the steps in this job which are comprised of the following:
- Checkout the code from the repository into this environment
- Use the Cypress GitHub action which will install the dependencies for us. Supply the Cypress GitHub action with the
buildandstartcommands - Run the
npm testcommand which will trigger our Jest tests
Depending on your project, you might need to tweak this process.
Adding the Workflow File
In order to get the CI build process we just discussed up an running we need to add it to our .github/workflows folder in the repository. In keeping with our task branching theme of creating issues for any change, we will follow the Git workflow we covered in the previous tutorial to add the file.
IMPORTANT: If you are not following this project management/Git workflow process you can just add the main.yml file directly to the .github/workflows folder however you like (you can even just do it directly through the GitHub UI if you want). Most of the steps below are not necessary for getting the CI builds working.
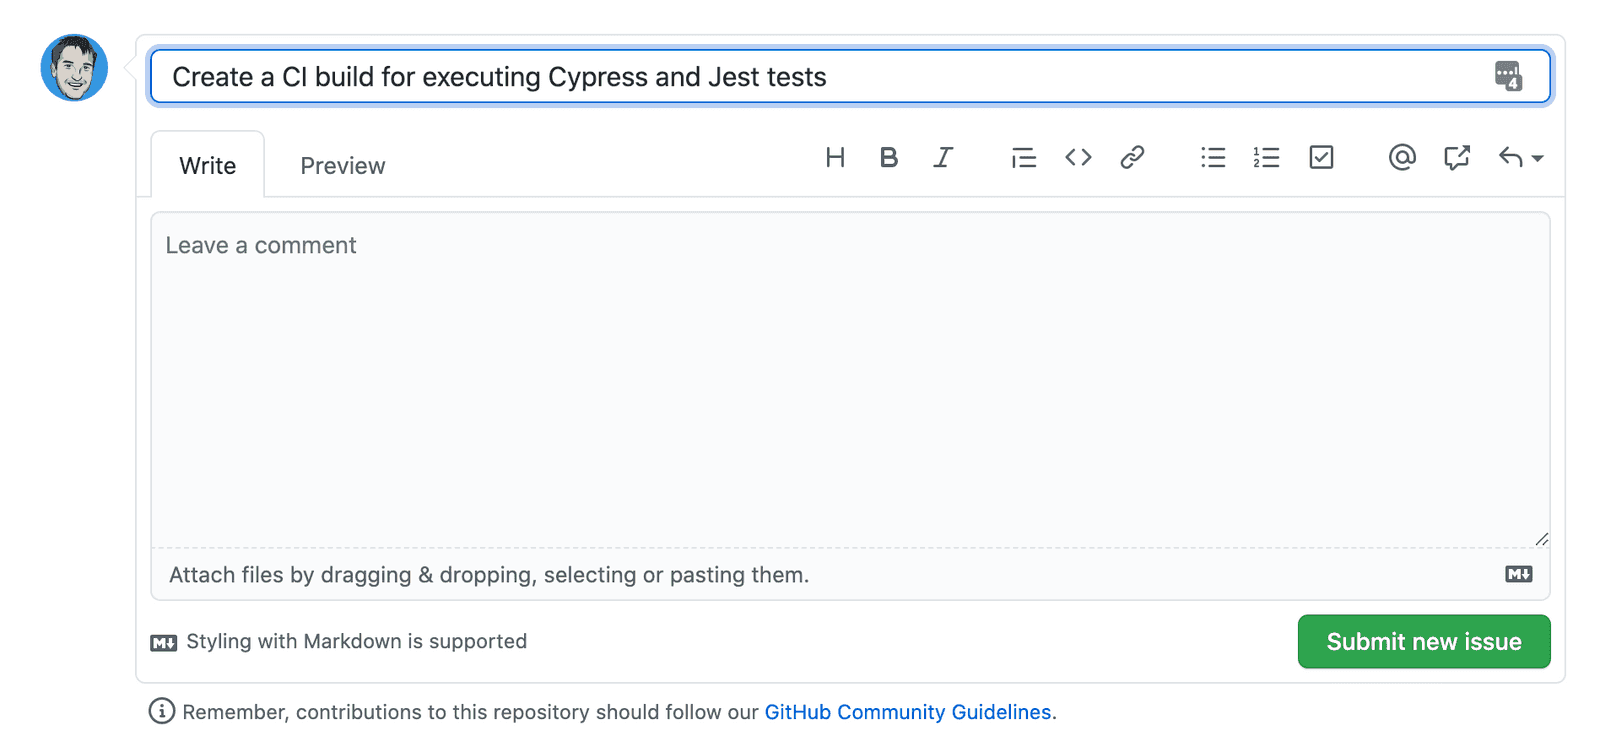
- Create an issue:
- Move the issue from the
BacklogtoCodecolumn in the Kanban board (we won't be adding a test for the workflow file):
- Checkout the main branch of your repository:
git checkout main
- Make sure you have the latest code:
git pull
- Create a new branch using the
[your-initials]-[issue-number]format:
git checkout -b jm-12
- Create the following file at
.github/workflows/main.yml
name: Tests

on: [push]

jobs:
  run-tests:
    runs-on: ubuntu-latest
    steps:
      - name: Checkout
        uses: actions/checkout@v2
      # Install NPM dependencies, cache them correctly
      # and run all Cypress tests
      - name: Cypress run
        uses: cypress-io/github-action@v2
        with:
          build: npm run build
          start: npm start
      - name: Jest run
        run: npm test
OR if you only want to run the builds on the main branch to save on resources you can change this line:
on: [push]to:
on:
  push:
    branches:
      - main
- Commit the code and push it back to the remote repository:
git add .
git commit -m "closes #[issue number] added CI build for running Cypress and Jest tests"
git push --set-upstream origin jm-12
Now we need to merge our task branch back into the main branch.
- Make sure that your local main branch has the latest code:
git checkout main
git pull- Rebase your task branch on top of the latest code from
main:
git checkout jm-12
git rebase main- Merge the task branch back into the
mainbranch:
git checkout main
git merge jm-12
git push
Now any time code is pushed to the repository (or when it is merged into the main branch, depending on which set up you went with) our CI build will be created automatically and the tests will run. You can check the status of the builds by going to the Actions tab in your repository on GitHub.
Creating a Status Badge
Although you can just go to the Actions tab to see if your builds are passing or failing, it is common to create a status badge that you can embed somewhere that will display whether the build is passing or failing. One of the key reasons for creating CI builds in the first place is so that we aren't relying on developers performing manual steps - having a clearly visible status badge on the main page of the repository makes the state of the branch more obvious.
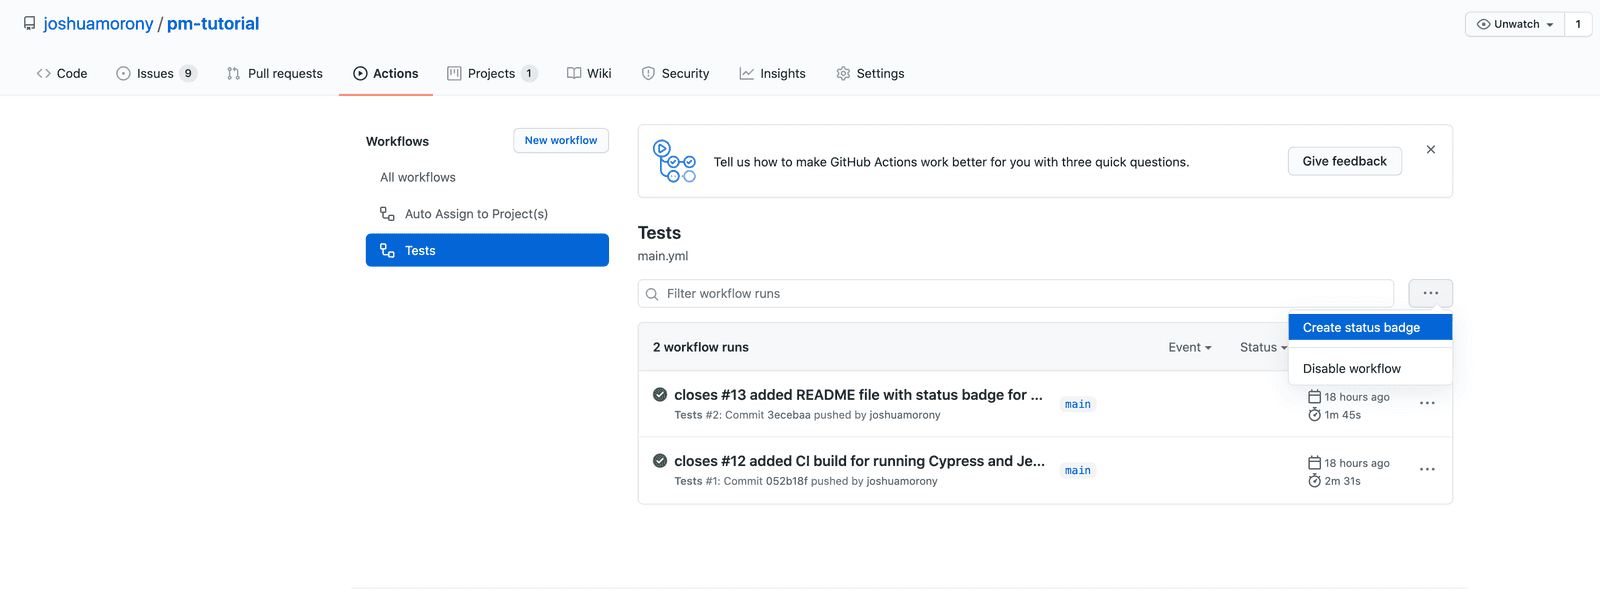
Go to Actions > Workflows > Tests and click the
...button then Create status badge:
Copy the markdown for the badge and you can place it wherever you like. Typically you would place this in the README.md file for your project so that you can see the passing/failing status on the main page of the repository.
If you are following along with the project management/Git workflow process we have been discussing, go through this entire process now (including creating the issue first) to add this badge markdown to the README.md file at the root of your repository (or create the file if it does not exist already). Remember, you can use this cheat sheet to help remember the steps.
I know it can be a bit arduous and seem a bit silly to go through such a structured process for something as simple as adding a bit of text to a README file, but if you slacken the rules for some situations where do you draw the line?
Viewing the Execution of CI Builds
The last thing I want to quickly cover is viewing the execution of your CI builds. If your builds are failing, or even if they are not, it might be useful to go through the logs and see what is actually happening.
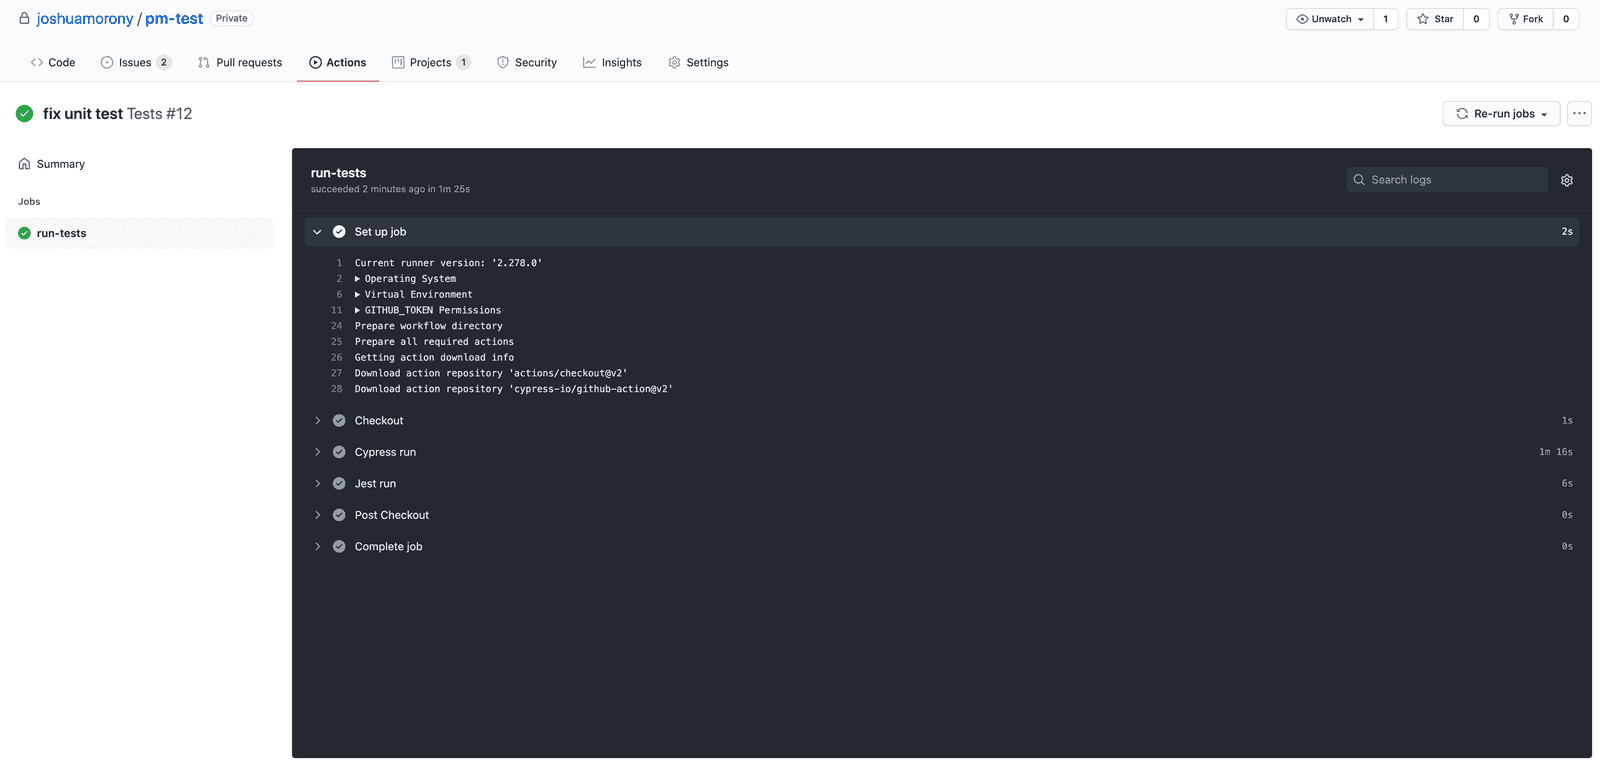
If you go to the Actions tab you will be able to see the execution of all the actions that have been run. Click on Tests to filter the Actions to only include the CI builds that are running our tests. You can now click on any of these, click on the run-tests job, and you will see something like this:
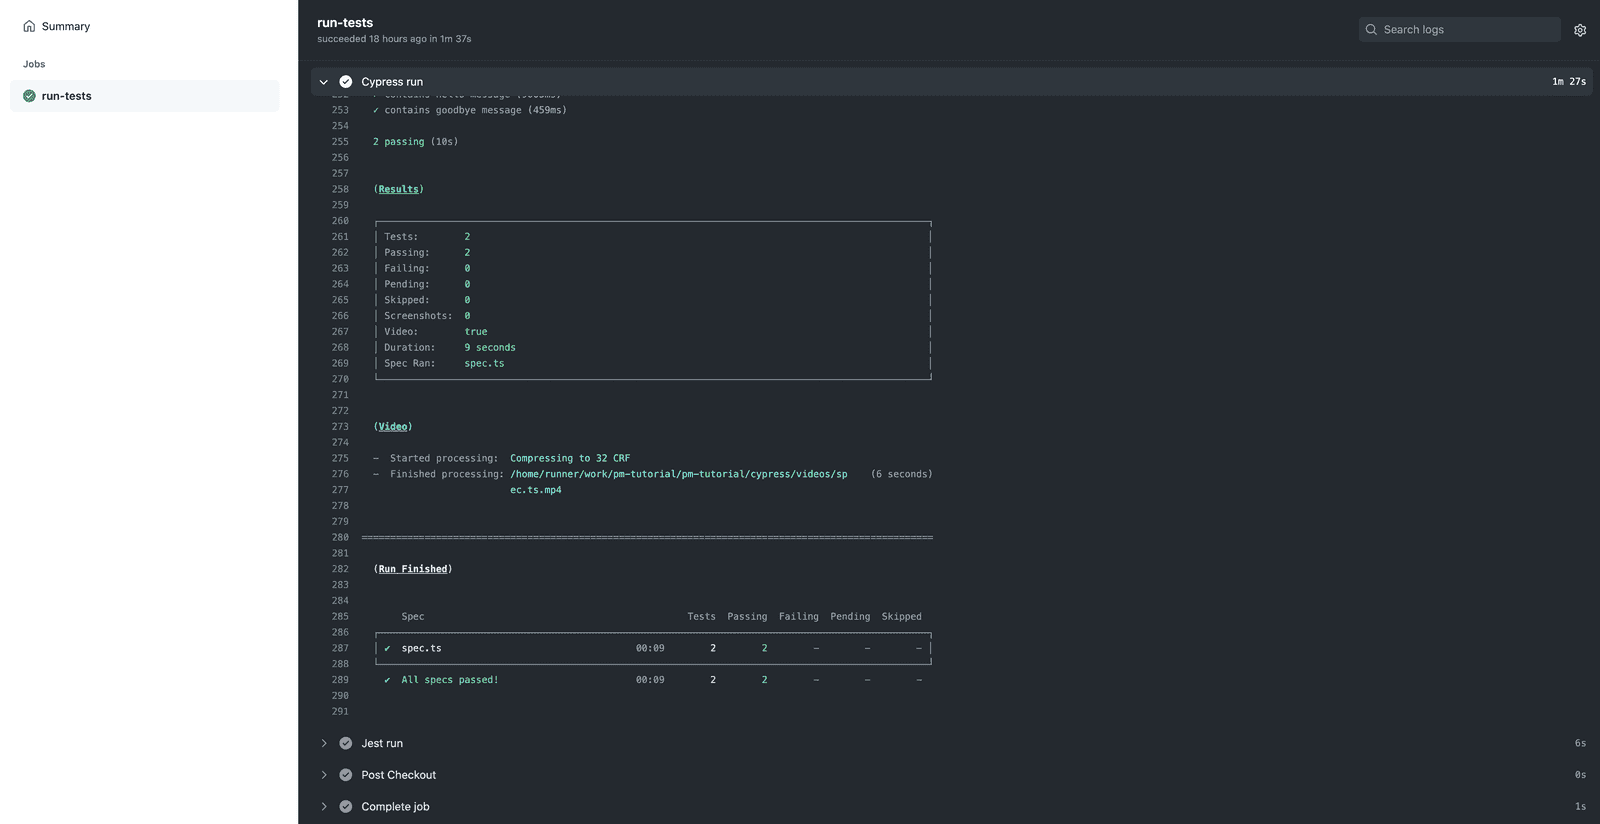
You can see each step of the job, and then you can also expand those steps to specifically see what has happened:
Summary
We have created a very simple CI build that will allow us to see if our main branch is in a stable and releasable state. Although this is about as simple as this gets, it already provides enormous value.
However, what we have created does not provide any specific governance controls. You can take this further to actually enforce certain things like only allowing pull requests to be merged if the CI builds have passed. If you would like to see me expand upon how all of this can be integrated more tightly with GitHub's governance features, let me know!

