Offline/Online Sync in a Real World Ionic Application with CouchDB
This is supposed to be a longer description
Migrating to Production
Migrating the application from your local machine to production servers
PROModule Outline
- Source Code & Resources PRO
- Lesson 1: Introduction PUBLIC
- Lesson 2: Application Requirements PUBLIC
- Lesson 3: A Brief Introduction to NoSQL PUBLIC
- Lesson 4: Introduction to CouchDB PRO
- Lesson 5: Introduction to PouchDB PRO
- Lesson 6: Structuring Data in CouchDB PRO
- Lesson 7: Installing CouchDB Locally PRO
- Lesson 8: Adding Data to Futon PRO
- Lesson 9: Starting the Application PRO
- Lesson 10: Setting up the Basic User Interface PRO
- Lesson 11: Using Design Documents to Create Views in CouchDB PRO
- Lesson 12: Getting Data From CouchDB into Ionic PRO
- Lesson 13: Using Node, Express, and SuperLogin PRO
- Lesson 14: Login and Registration PRO
- Lesson 15: Offline Access and Reauthentication PRO
- Lesson 16: Advanced Form Validation PRO
- Lesson 17: Restricting Document Updates PRO
- Lesson 18: Filtering Data from CouchDB PRO
- Lesson 19: Improving User Experience PRO
- Lesson 20: Migrating to Production PRO
- Lesson 21: Conclusion PRO
Lesson Outline
Migrating to Production
Everything in the application is working as it should be, but it's only going to work when testing on our local development machine because that's where both our server and CouchDB database are running. In order to be able to test it on a device, and make it accessible to everyone in the world, we will need to migrate to a real hosting solution.
Hosting Options
There are a few paths you can go down when migrating from your local development machine to "the cloud". We will be using Heroku to host the server and Cloudant to host our CouchDB database, but I want to talk a little about the various options for hosting CouchDB databases.
You can just download CouchDB yourself and install it on a server you control. However, this will involve a bit of work to congifure both the server and CouchDB.
One of the most popular options is Cloudant which is a Database as a Service (like Firebase), it's available through IBM and they handle the hosting of the database, you just need to worry about using it. One downside of using a Database as a Service is that there is always the concern that you are relying on a service that could make pricing changes or even shut down completely at some point (this has happened with popular DBaaS solutions in the past). This is less of an issue for Cloudant, since a CouchDB database could easily be ported anywhere (you could just replicate your Cloudant database to a CouchDB database hosted somewhere else, and you would be pretty much good to go). I find Cloudant to be the best overall option, even though I find using IBM's dashboards to be a pain (IBM are massive and have a ton of different products, which naturally seems to lead to a less than ideal interface for managing your accounts/services).
The best self hosted option I have come across is Bitnami. It gives you access to the latest version of CouchDB, and it let's you choose from a variety of providers to host on. You can choose from:
- Amazon Web Services
- Google Cloud Platform
- Oracle Cloud Platform
- Microsoft Azure
- CenturyLink
- 1&1 Cloud Platform
- Open Telekom Cloud
The benefit of using Bitnami is that it is self hosted, but Bitnami deploys everything for you so it all comes mostly configured out of the box. I say "mostly" configured because there is still quite a bit of server configuration you will need to do yourself, especially if you want to set up an SSL certificate (which is generally a good idea to have by default, but critical if your application needs to communicate sensitive information like a password).
This added difficulty in configuration is ultimately why I decided to go with Cloudant as the "official" solution for this module.
Using Cloudant
Let's first get our CouchDB database set up on Cloudant. Basically all we want to do is replicate what we already have on our local CouchDB database onto Cloudant. To get started, you can sign up for the free trial for Cloudant with IBM: IBM Cloudant. This will allow you to use the "Lite" version of the service without requiring a credit card, but you can also sign up for the full version to get free credits if you wish.
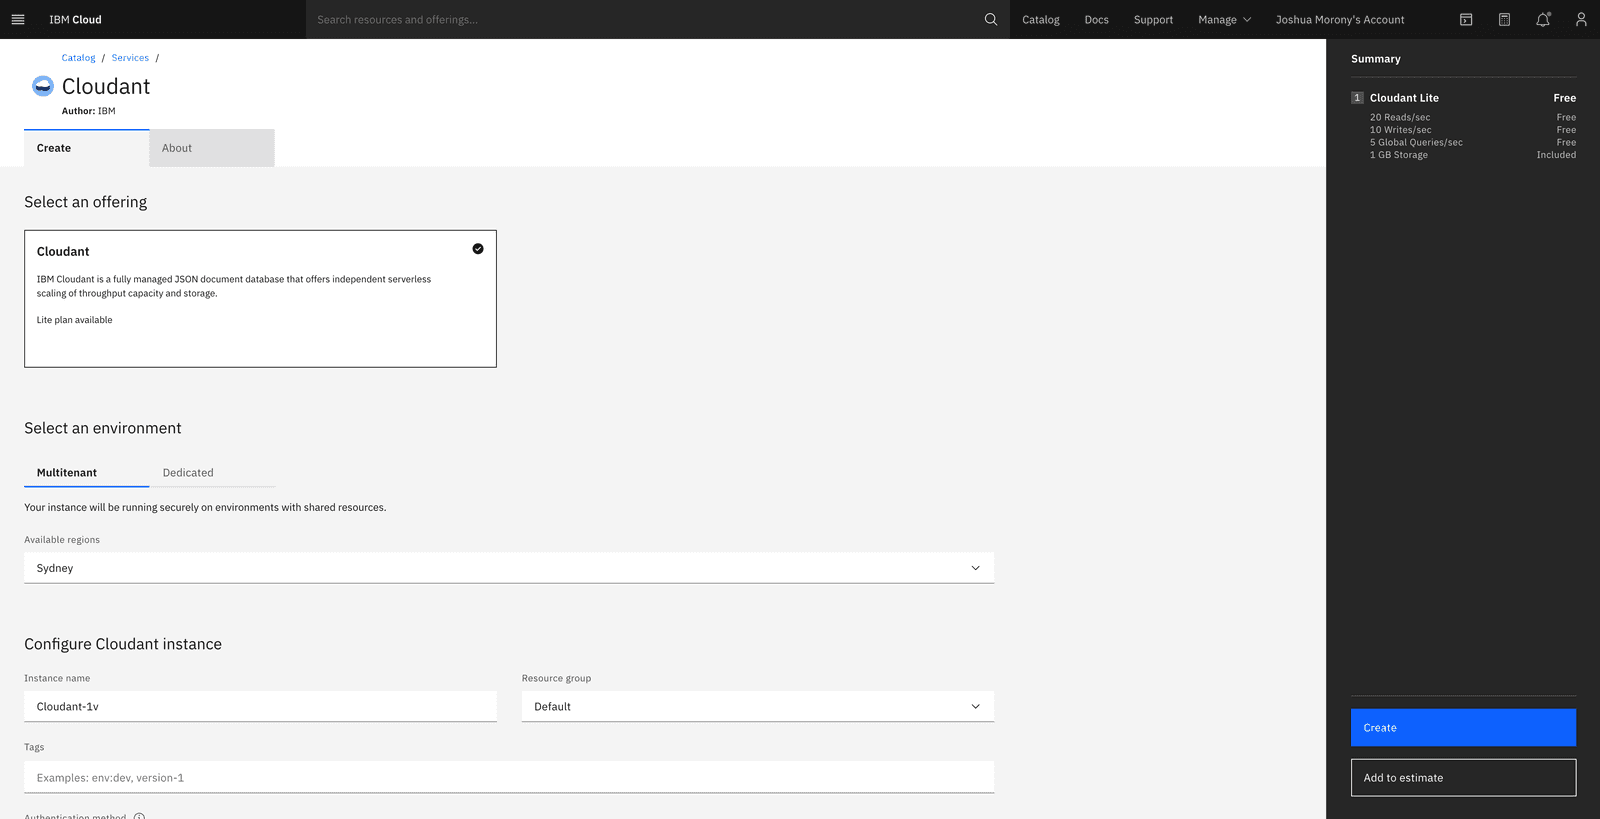
What you will be signing up for is actually an IBM Cloud account which has access to IBM's other services as well. Once you are logged into your account you should navigate to the IBM Cloudant section by going to Products > Databases > IBM Cloudant. Now you will be able to select the option to get a free trial. You should eventually come to a dashboard that looks like this:
You can now configure your database however you like, but generally just keeping the default options is fine. Make sure to select the Lite plan unless you want to organise paying for higher usage.
IMPORTANT: If you want to be able to replicate your local CouchDB database to Cloudant (not required, but it can make the migration easier) make sure to change the Authentication method to IAM and legacy credentials.
Click Create to create your database.
You will then be taken to your Resource list which is an overview of all of our IBM services. You should notice that there is a section called Services and if this is your only IBM service it should have a (1) next to it. If you expand this, you will see your Cloudant database (which might still be in the process of provisioning). Once provisioning has finished just click on the name, e.g. Cloudant-1v to open the database.
In a moment we will launch the dashboard to get into all the juicy CouchDB stuff, but first, we will need to set up some credentials so that SuperLogin can communicate with the database. Click on the tab on the left that says Service Credentials.
Click on the button that says New credential. You can just keep the default name and role of Manager and then click Add. The new credentials will appear on the screen, and you can click View credentials to see them. We are now going to use these credentials to update the server configuration.
Update the Server
Now we have a situation where we want to use two different configurations for our Database. In the development environment we will want to use our local CouchDB database and credentials, and in the production environment we will want to use our Cloudant database and credentials.
To make this situation smoother, we are going to add a bit more configuration to our Node server. First, we are going to add a new environment variable as now the host address will change depending on whether we are in a development or production environment.
Modify your .env file in your server folder to reflect the following:
COUCHDB_HOST=127.0.0.1:5984
COUCHDB_USER=admin
COUCHDB_PASS=yourcouchdbadminpassword
NOTE: Make sure to replace yourcouchdbadminpassword with your own local CouchDB admin password.
These are the values we will want to use for development, but for our production environment we will want to use a different set of values:
COUCHDB_HOST=abcde-fghij-klmno-bluemix.cloudantnosqldb.appdomain.cloud
COUCHDB_IAM_API_KEY=abcde-fghkdsf-ewfs32-bluemix
IMPORTANT: Do not update your .env file with these values. This is just to demonstrate the values we need.
Thanks for checking out the preview of this lesson!
You do not have the appropriate membership to view the full lesson. If you would like full access to this module you can view membership options (or log in if you are already have an appropriate membership).

